Have you ever wanted to build your own digital dice roller? In this project, we’ll use an Arduino Uno, a vibration sensor, and an LCD display to simulate a dice roll. Shake the device and watch it roll a number from 1 to 6—just like a real dice! A buzzer will beep to confirm the roll. Let’s dive in!
Project Overview
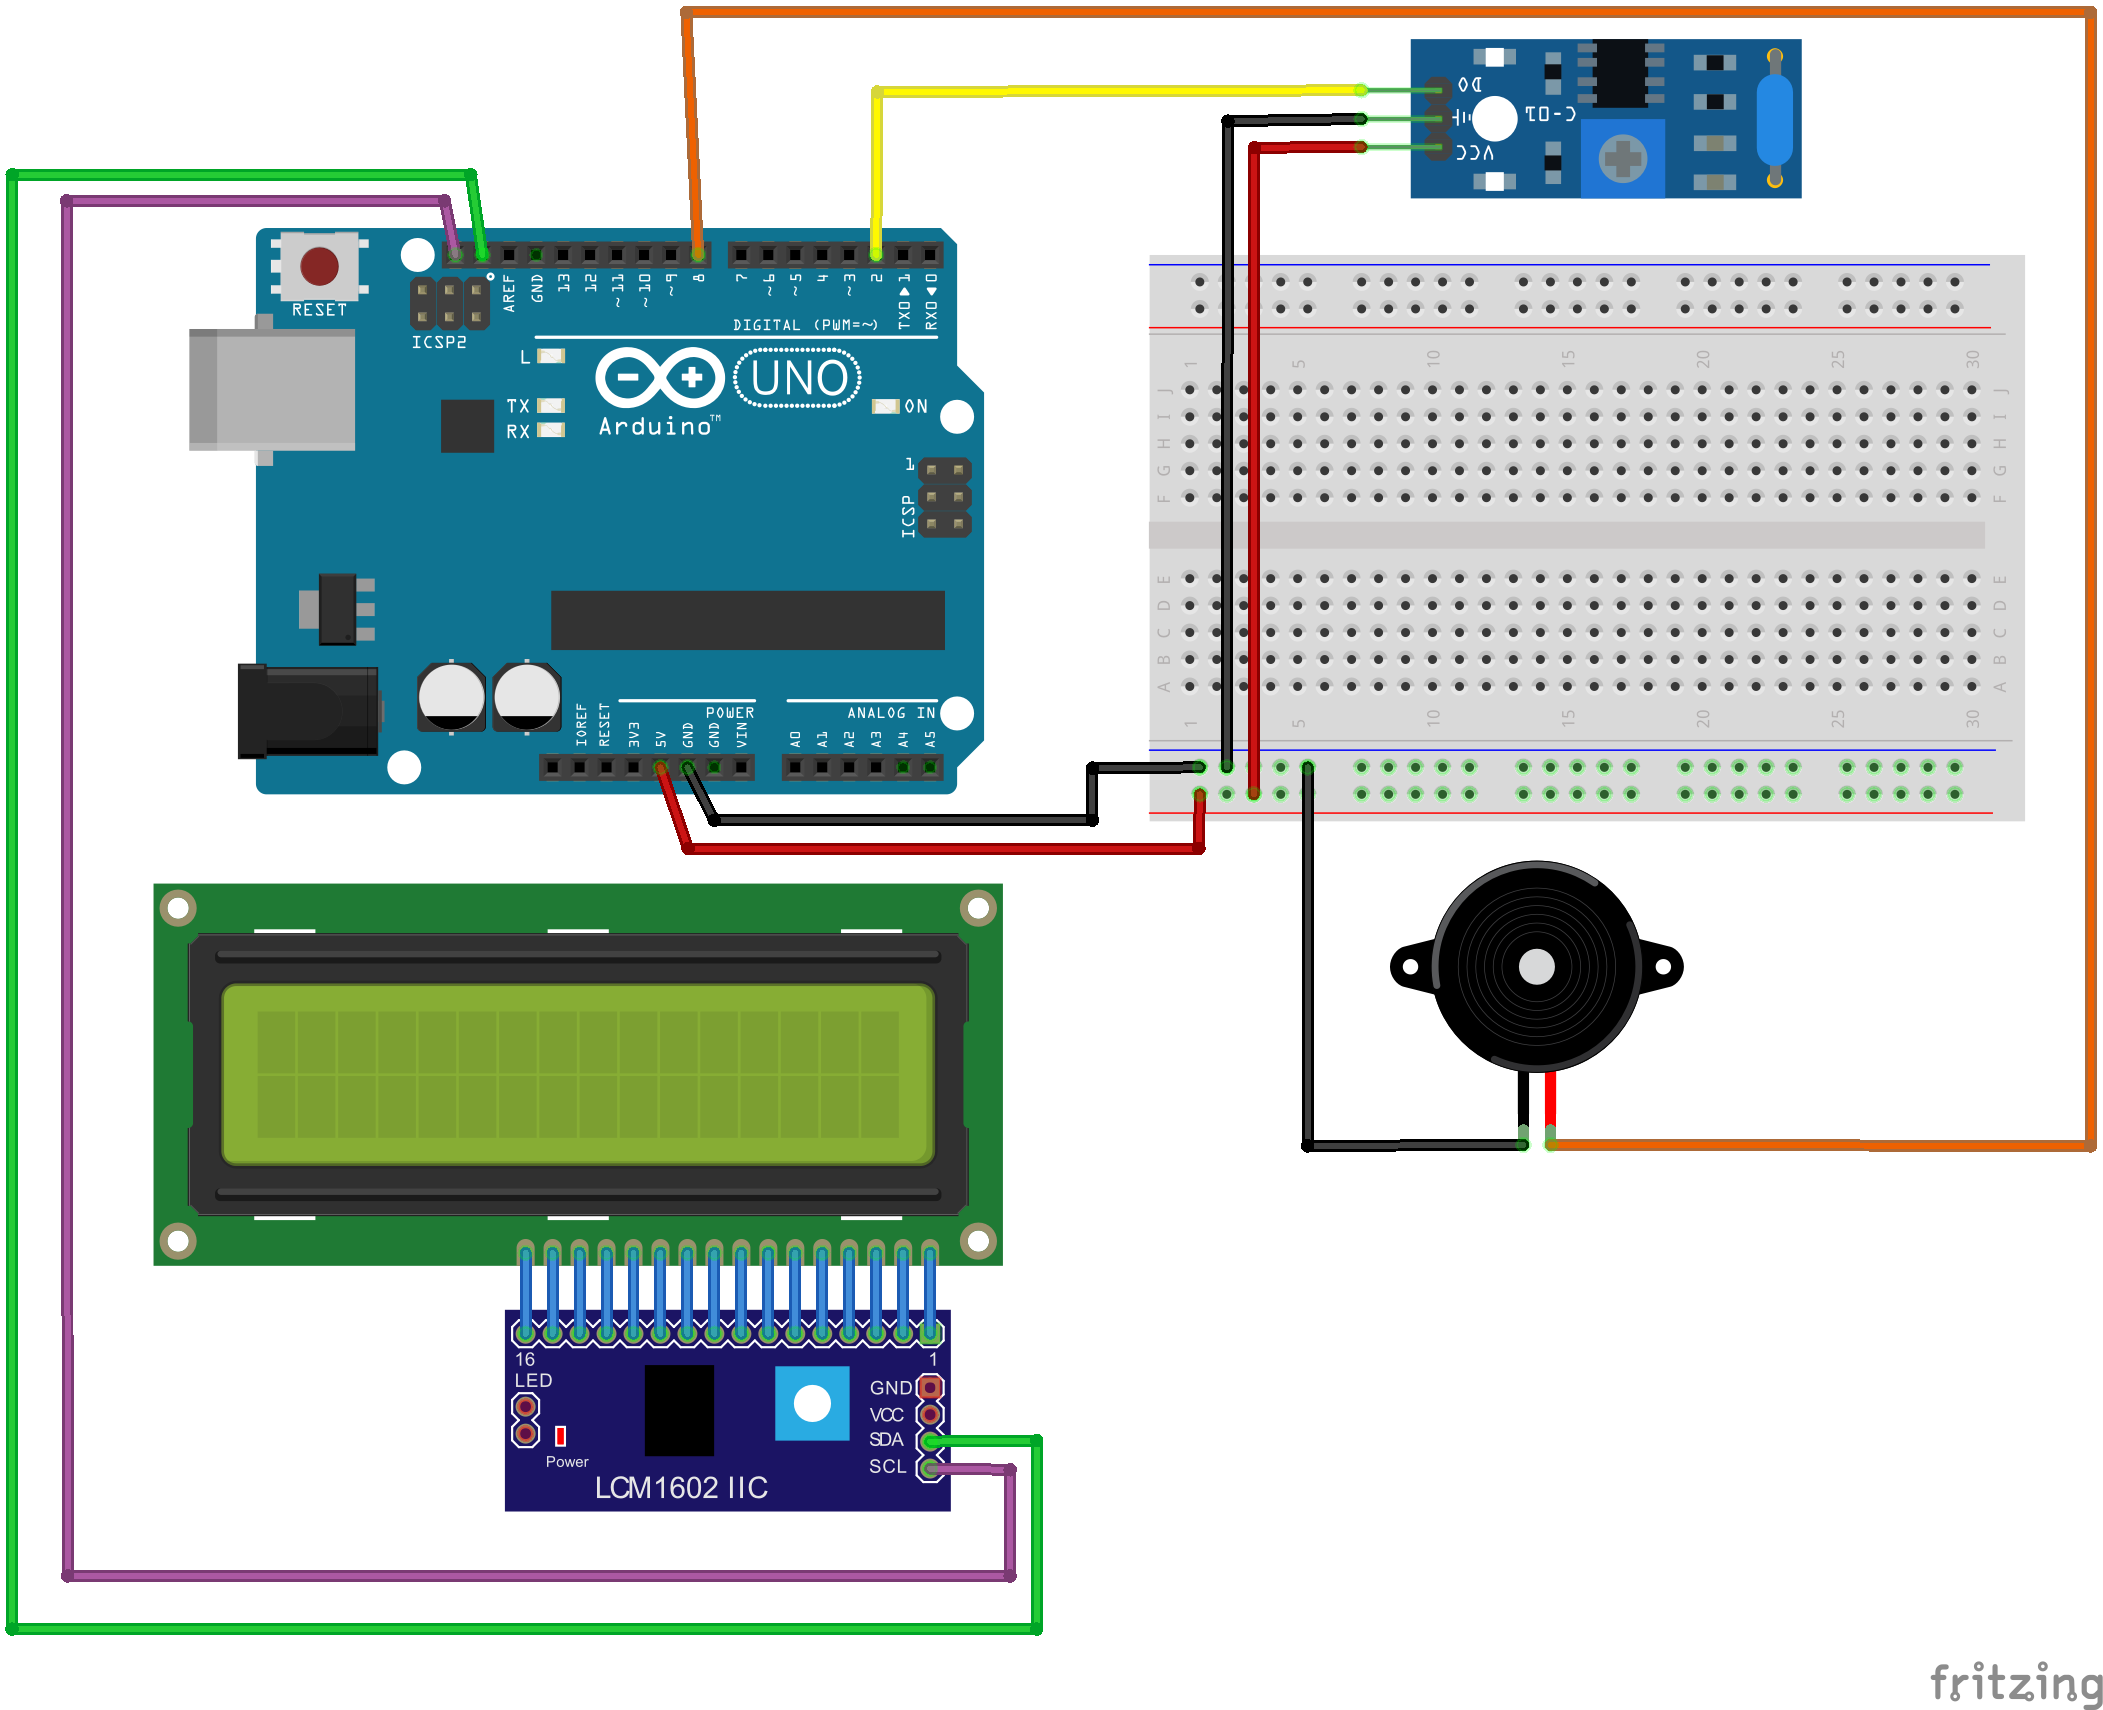
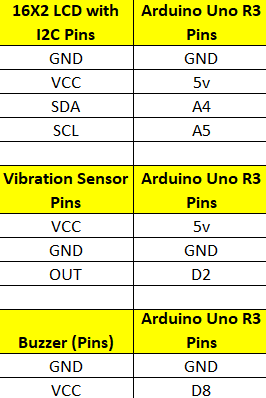
Connections:
📦 Library Prerequisites
Before uploading the code, make sure the following libraries are installed in your Arduino IDE:
LiquidCrystal_I2C
Wire (pre-installed with Arduino IDE)
🔽 How to Install LiquidCrystal_I2C:
Open Arduino IDE
Go to Sketch > Include Library > Manage Libraries
Search for
LiquidCrystal_I2CInstall the one by Frank de Brabander or equivalent
Wire.hcomes pre-installed with Arduino IDE

Arduino Code
Copy and Upload the following code to your Arduino:
#include <Wire.h>
#include <LiquidCrystal_I2C.h>
LiquidCrystal_I2C lcd(0x27,20,4); // set the LCD address to 0x27 for a 16 chars and 2 line display
const int vibPin = 2;
const int buzzerPin = 8;
bool ready = true;
void setup() {
lcd.init();
lcd.backlight();
lcd.setCursor(0, 0);
lcd.print("Shake to Roll!");
pinMode(vibPin, INPUT);
pinMode(buzzerPin, OUTPUT);
randomSeed(analogRead(A0)); // Seed randomness
}
void loop() {
int vibState = digitalRead(vibPin);
if (vibState == HIGH && ready) {
ready = false;
int diceNumber = random(1, 7); // Random number between 1 and 6
lcd.clear();
lcd.setCursor(0, 0);
lcd.print("You rolled a:");
lcd.setCursor(6, 1);
lcd.print(diceNumber);
tone(buzzerPin, 1000, 200); // Beep sound
delay(1000); // Delay before allowing next roll
lcd.clear();
lcd.setCursor(0, 0);
lcd.print("Shake to Roll!");
ready = true;
}
}
How It Works
Let’s break down the working logic:
Shake Detection:
The vibration sensor has a spring inside. When you shake the breadboard or setup, the spring momentarily closes a circuit, sending a HIGH signal to pin 2.Random Number Generation:
Using randomSeed() and random(1, 7), the Arduino generates a pseudo-random number from 1 to 6.Display Output:
The result is shown on the 16x2 LCD screen via the I2C interface. This simplifies wiring, needing only 4 wires.Sound Feedback:
A quick beep from the buzzer provides audio feedback to enhance the user experience.
Testing & Troubleshooting
If LCD is blank, check the I2C address (use an I2C scanner sketch).
If the vibration sensor is too sensitive, try using a short delay() of 10ms after the shake to debounce.
If the buzzer doesn’t beep, confirm it's not connected in reverse.
Final Output
When you shake the setup:
The LCD displays a message like “You rolled a: 4”
The buzzer beeps once
Then it resets to “Shake to Roll!” waiting for the next movement
Enhancement Ideas
Want to take your project further?
Add RGB LEDs to light up with the number rolled.
Show a rolling animation (1 to 6) before showing the final number.
Use a gyroscope or accelerometer for more refined motion sensing.
Add a battery module for portability.
Conclusion
With just a few components and some simple code, you’ve built a fully functional digital dice roller using Arduino! It’s a fun and practical way to explore motion detection, display output, and buzzer interaction—all skills you can carry into more advanced projects.